Big Chungus Online - Nebula Setup
This chapter covers:
- Some basic Nebula terminology
- How to setup Nebula and get it running
This tutorial does not cover the fundamentals of Godot. You should at least be familiar with Godot's key concepts.
If you wish to skip ahead and download the finished game now, the repo is available on Github: https://github.com/Heavenlode/Nebula-Big-Chungus-Demo
Introduction
As an introduction to Nebula, we're going to make a game called Big Chungus Online. The objective of the game is to consume pellets to grow your character bigger. Larger players eat smaller ones. Definitely not inspired by another game.
Note
The tutorial was done on macOS, but the steps should all be basically the same on Windows and Linux.
By the end of this tutorial, you'll have made this game:

Installation
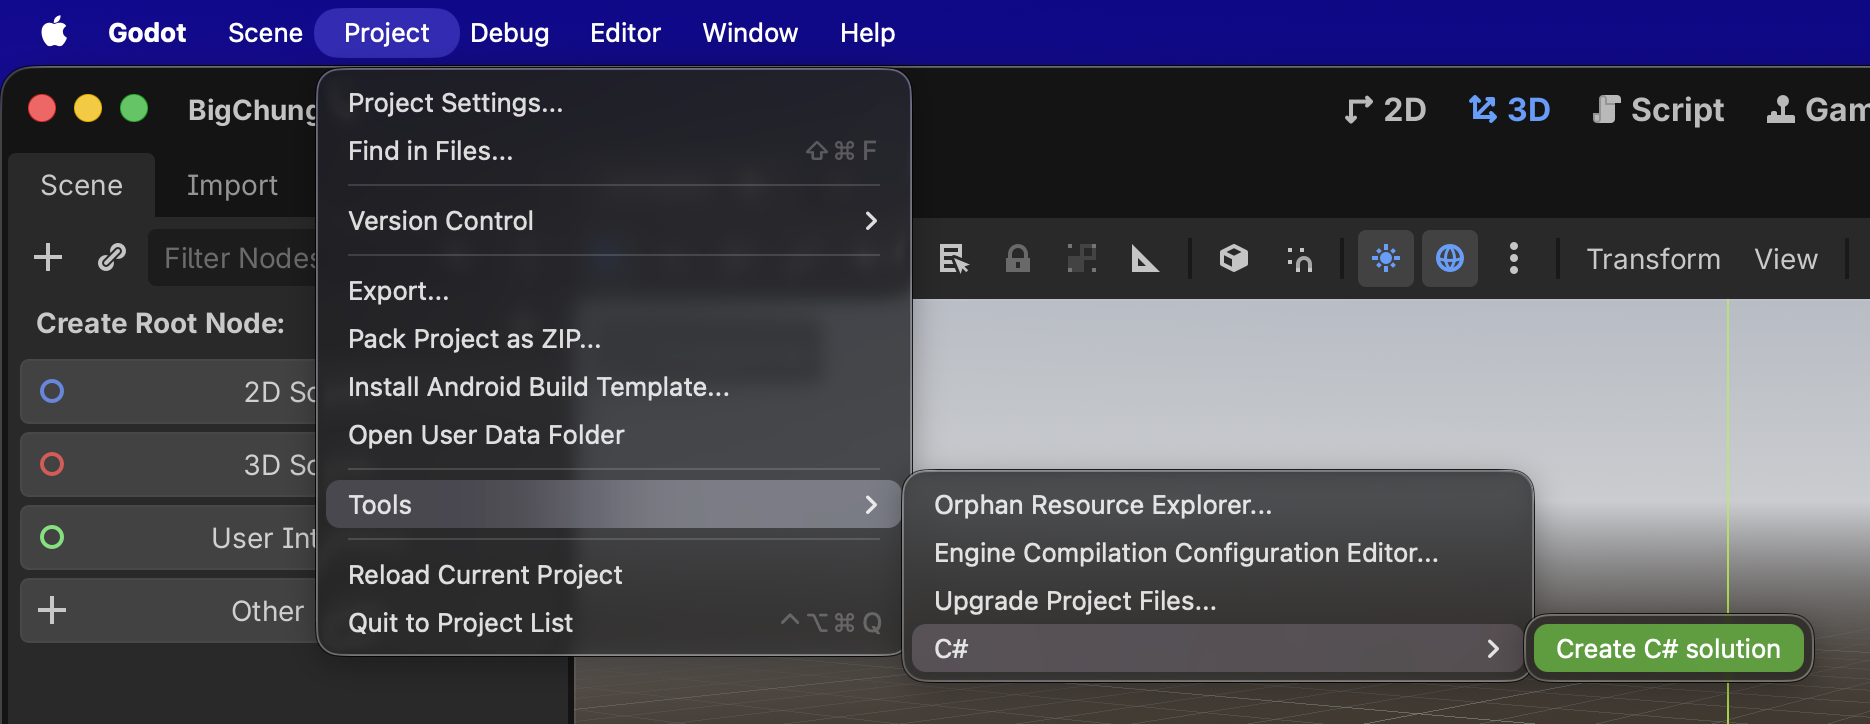
First, we'll create a Godot project, and create a C# solution for it. We'll need to make sure we have the .NET version of Godot installed to do this. This is possible for existing Godot projects too if preferred!
Now download Nebula (Github download link). From this zip, we'll copy the addons folder into our new Godot project. We might get errors in Godot which is fine, just ignore it.
At this point, we need to make sure your Godot project knows to include Nebula in the build. To do that, we'll add it to our .csproj file so it looks something like this:
<Project Sdk="Godot.NET.Sdk/4.6.0-rc.1">
  <PropertyGroup>
    <TargetFramework>net10.0</TargetFramework>
    <EnableDynamicLoading>true</EnableDynamicLoading>
  </PropertyGroup>

  <Import Project="addons\Nebula\Nebula.props" />
</Project>
It is rcommended that we bump the TargetFramework to net10.0. It just adds C# features and greatly improves the overall performance of Nebula.
Let's go ahead and build our project now and it should succeed (warnings might come up and can be ignored.)
At this point, a file called FodyWeavers.xml will suddenly appear in the project root. This is just part of the internal tooling for Nebula's IL Weaving magic, so we'll leave it alone.
Now that we've built the project, we can go ahead and enable Nebula in the project settings.
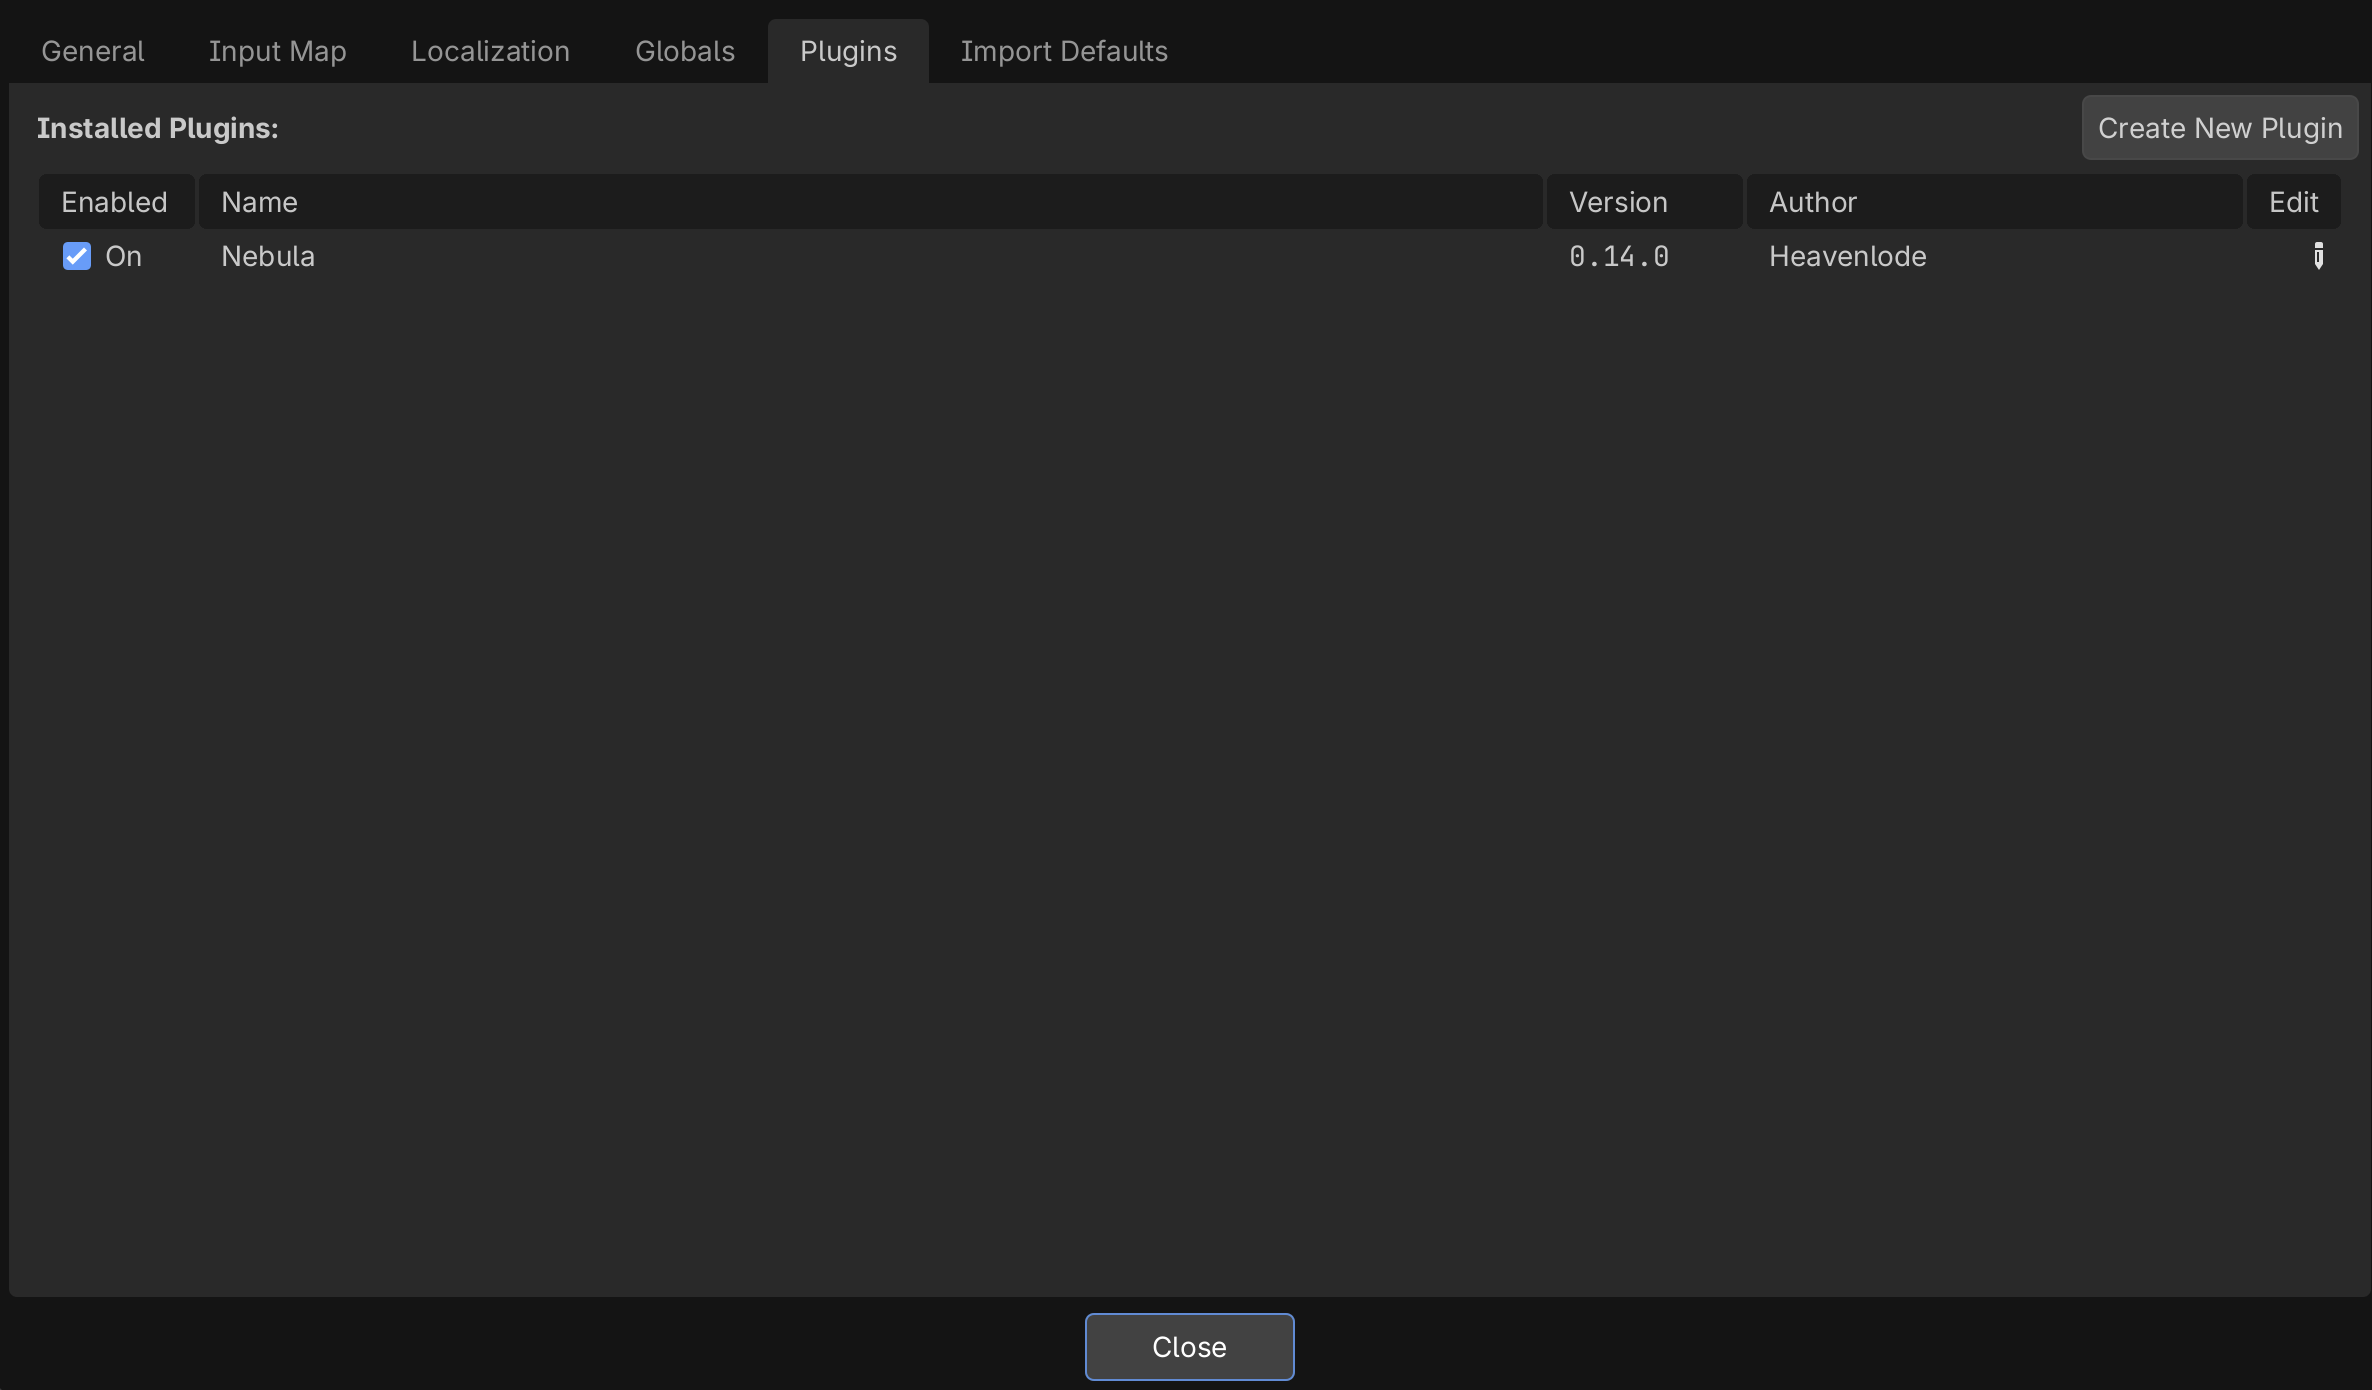
Warning
Trying to enable Nebula before compiling/building will result in errors and fail to enable. It can only be enabled after the build succeeds.
Getting things running
To wrap up this chapter, we're going to get the server running and two clients connected. No fancy visuals, just very simply getting things running.
Nebula requires you to tell it when to start the server or start client. However, we can skip that boilerplate by using the free scene that comes with Nebula to handle it for us. (In the future if you want to alter or expand the functionality, you can simply copy the scene/code as needed.)
For that boilerplate, we'll just set Godot's Main Scene to res://addons/Nebula/Utils/ServerClientConnector/default_server_client_connector.tscn
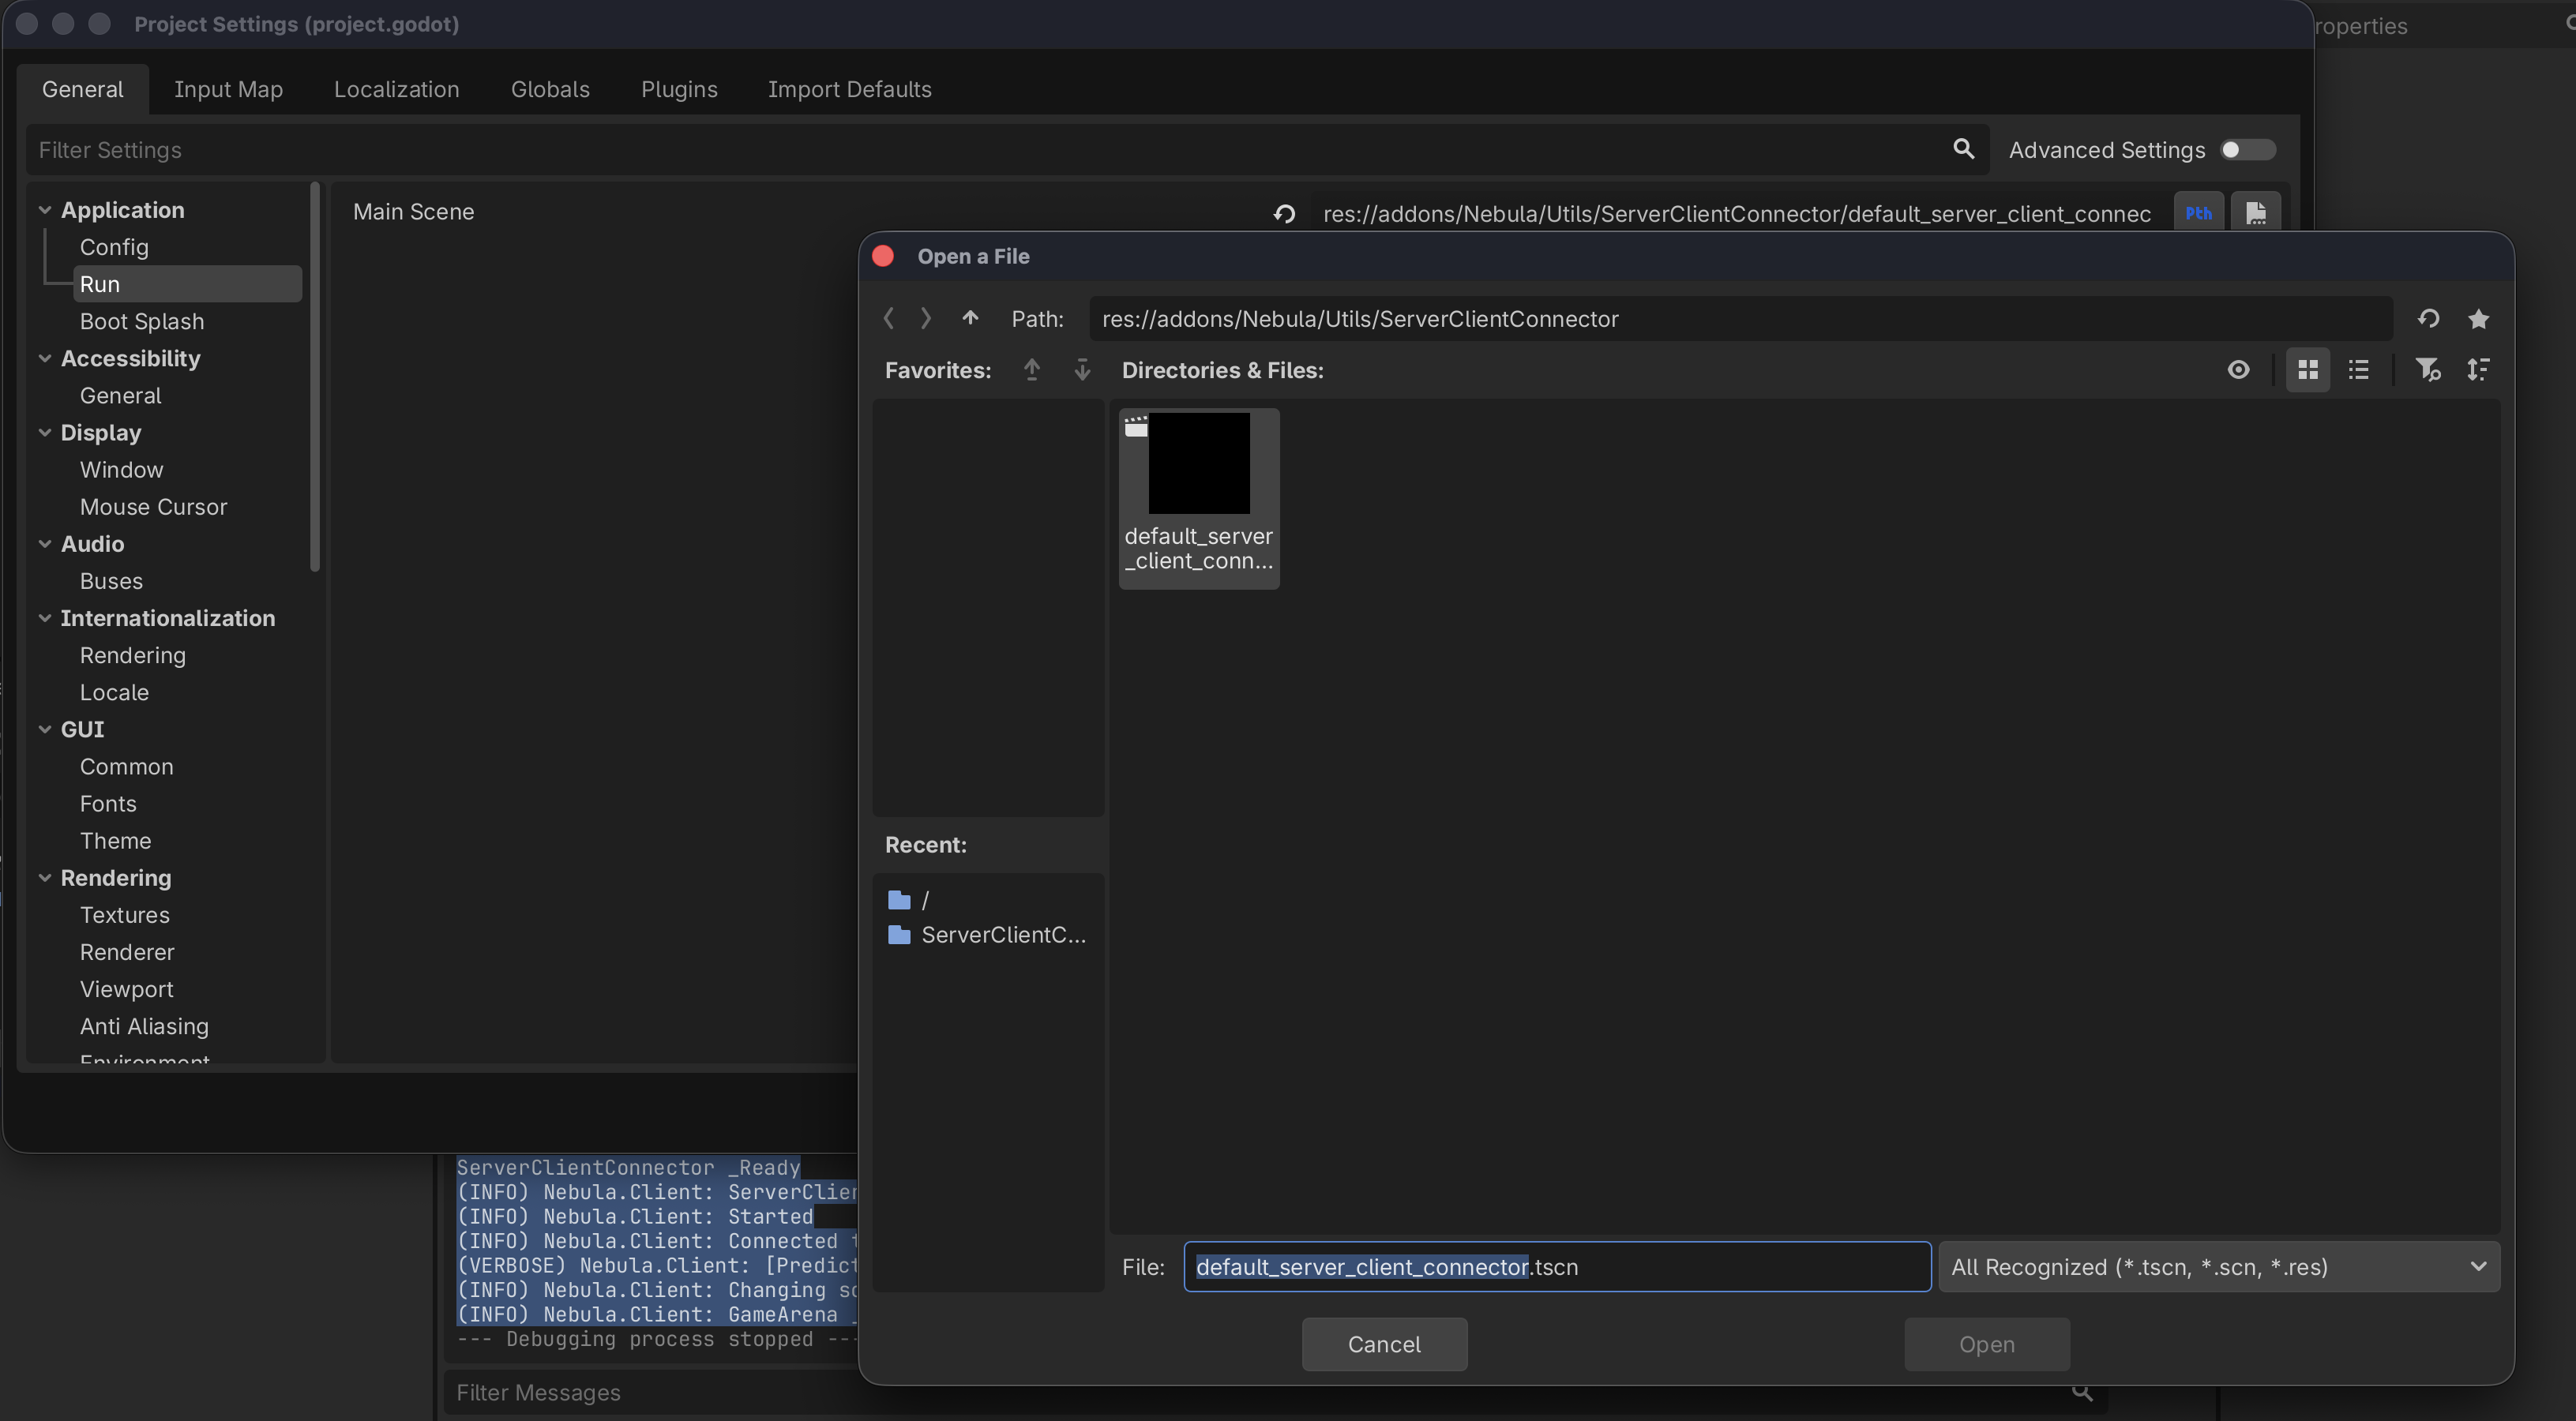
Don't worry, this isn't going to be the scene where the game lives. This scene will tell the server to create our game World for us. How does it do that?
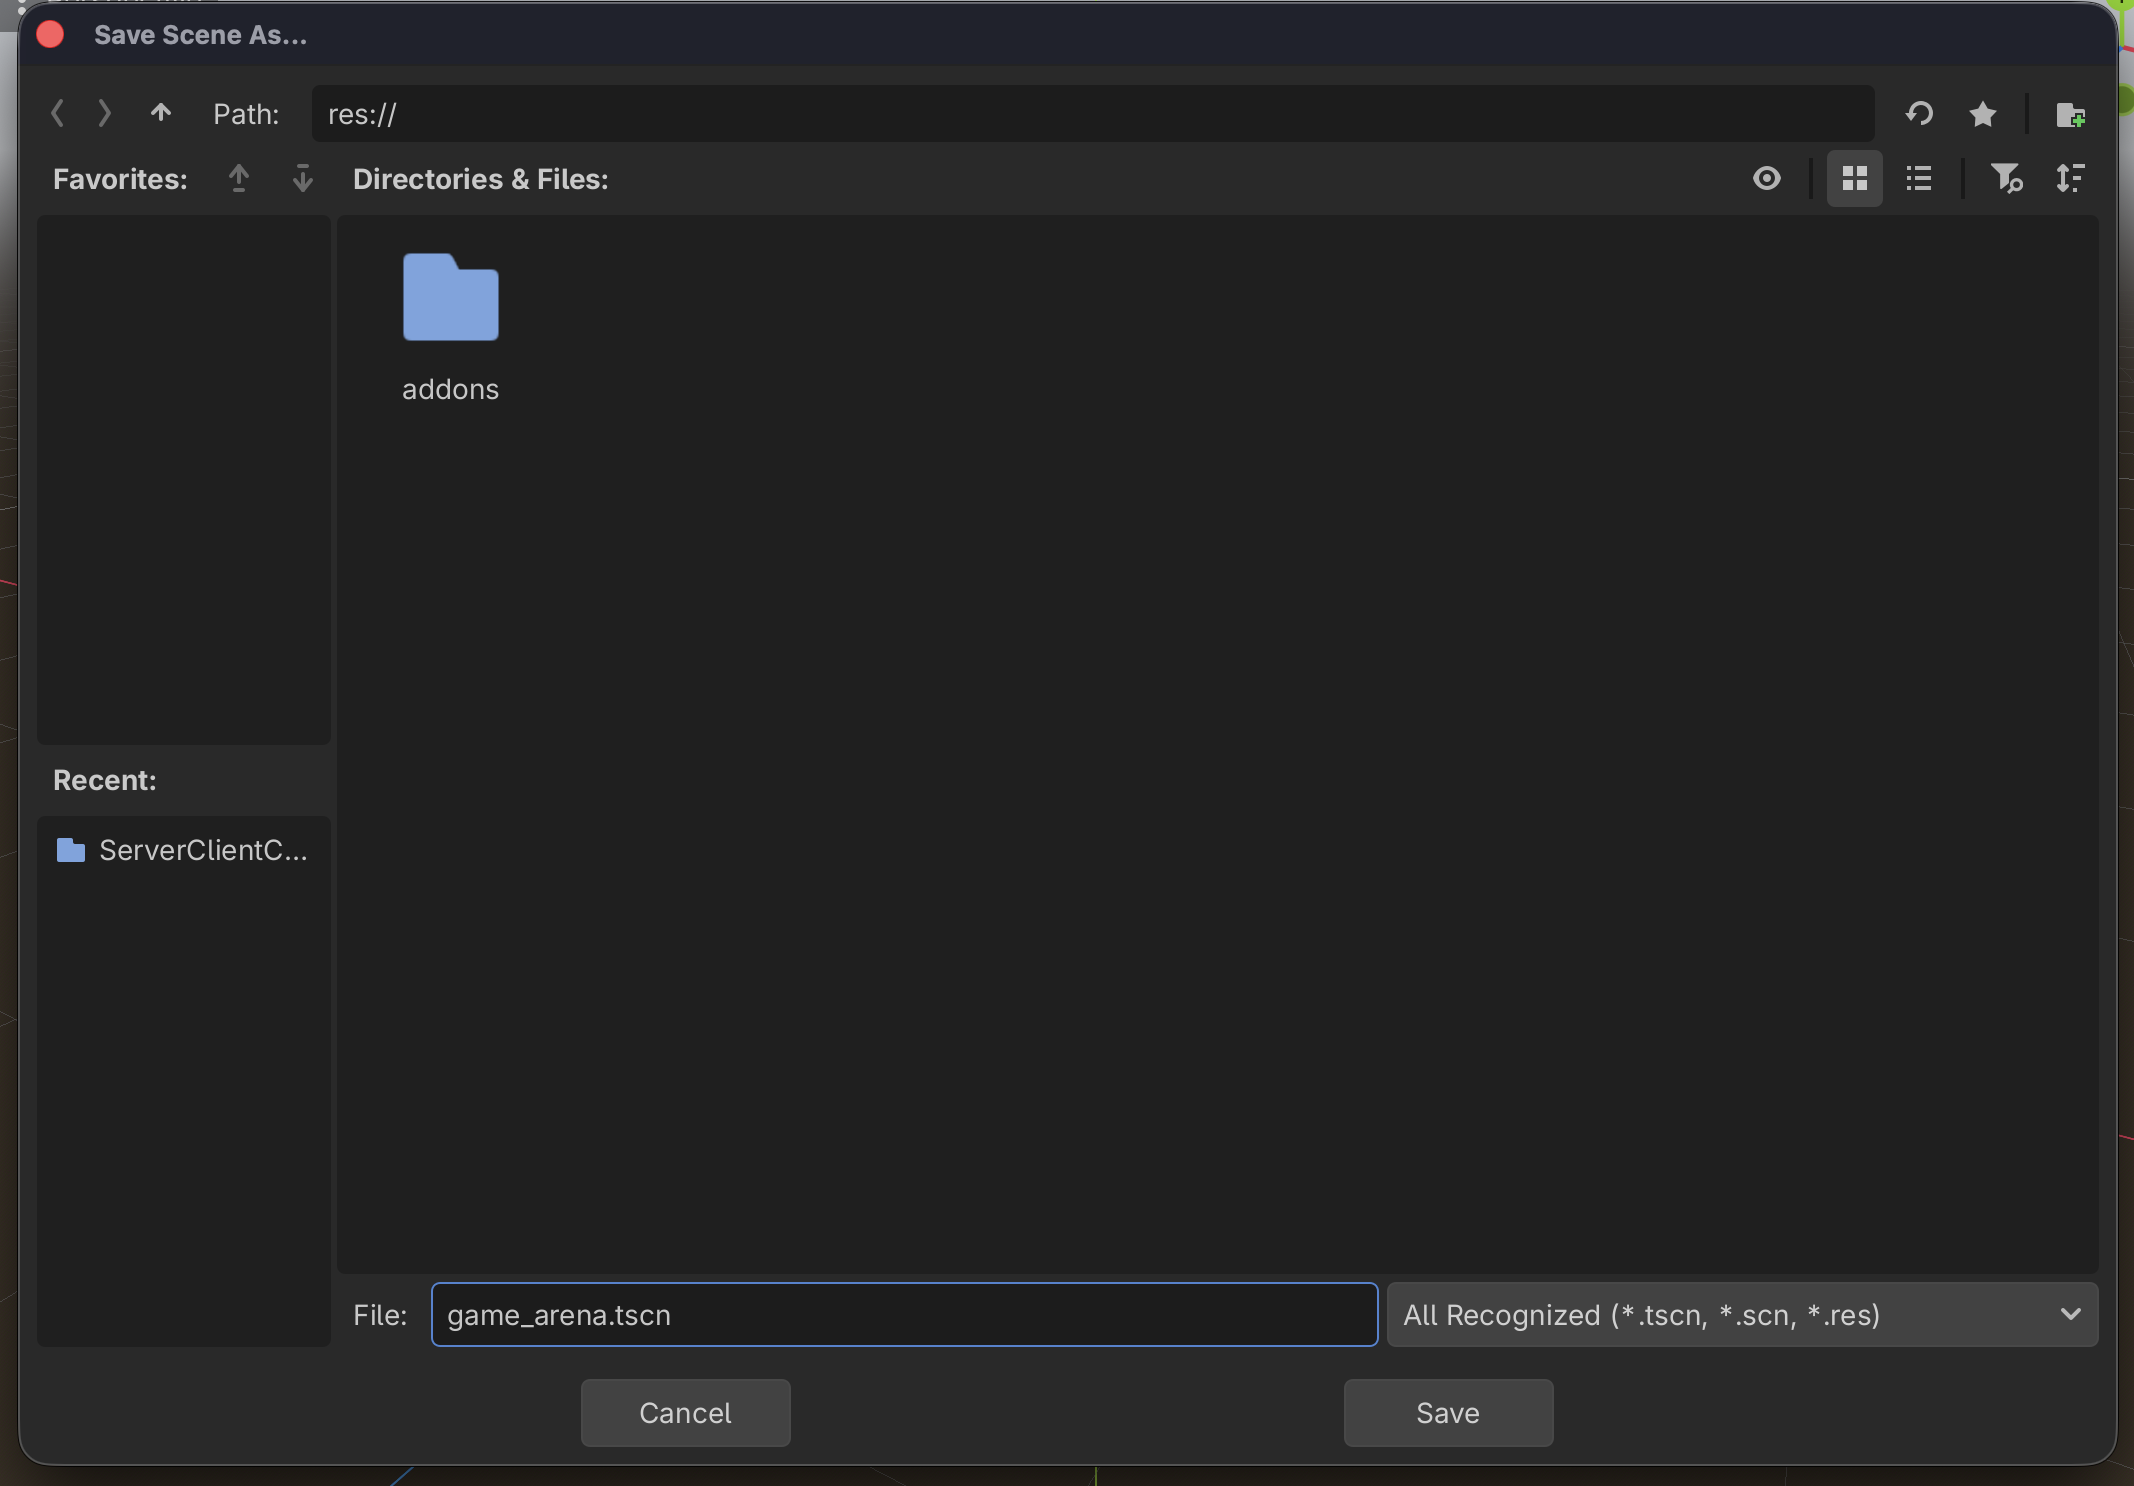
Well, first let's setup a new blank scene with a Node3D, and attach a C# script to it, called GameArena.cs
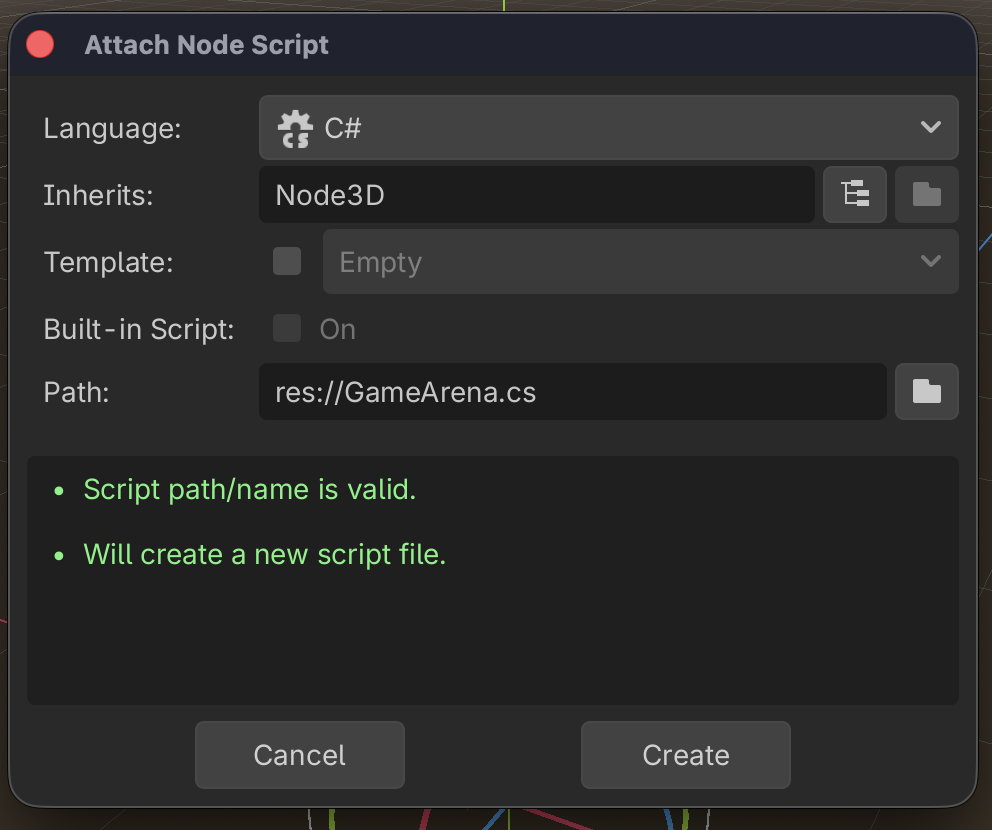
The script will have the following content:
using Nebula;
using Nebula.Utility.Tools;

public partial class GameArena : NetNode3D
{
    public override void _WorldReady()
    {
        base._WorldReady();
        Debugger.Instance.Log(Debugger.DebugLevel.INFO, $"GameArena _WorldReady!");
    }
}
That's it, we've created our first Nebula "World" and "NetScene".
What makes it a NetScene? The fact that it is a NetNode3D that is the root node of a Godot scene. Nebula automagically understands that and catalogues it internally.
What makes it a World? Well, it will be a World as soon as we use it to spawn a new "instanced environment" in Nebula. For testing, or a smaller game like Big Chungus, we'll just keep it simple and have one World.
Note
For larger games (e.g. instanced dungeons) we can create multiple Worlds in the same Server instance. Nebula does this by utilizing Godot's World3D node. This is beyond the scope of this tutorial.
To tell Nebula to use game_arena.tscn as our World scene, we set the "Default Scene" under the new "Nebula -> World" section in Project Settings.

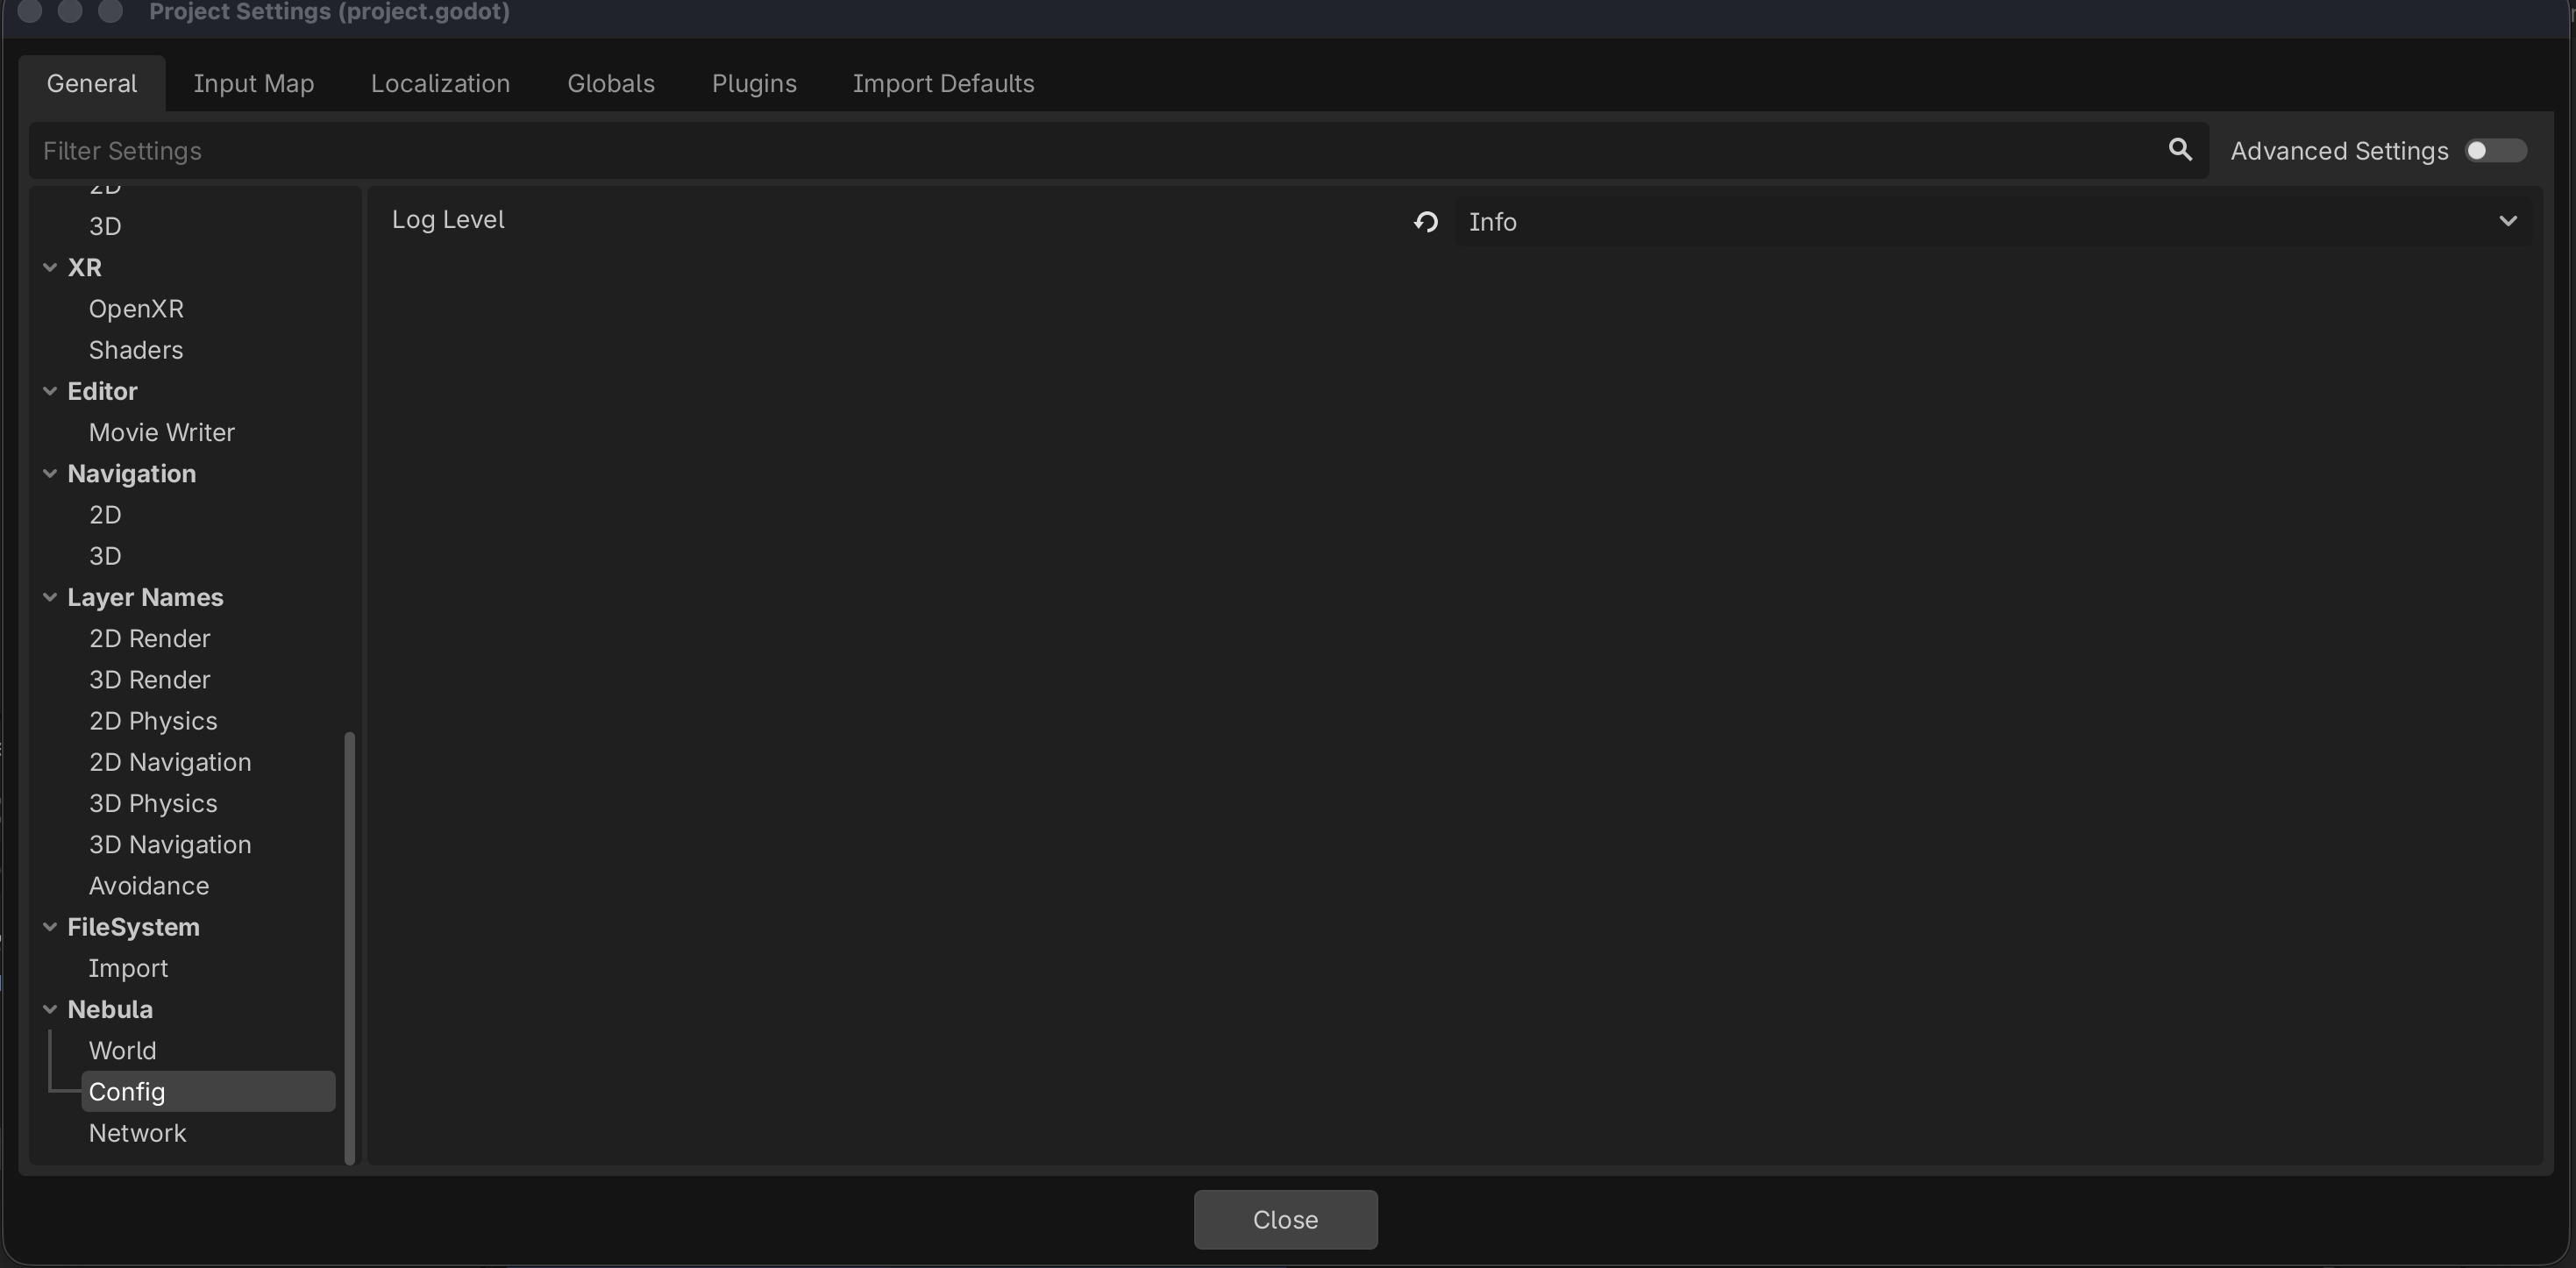
While we're at it, let's update Nebula's debug log level to "INFO"
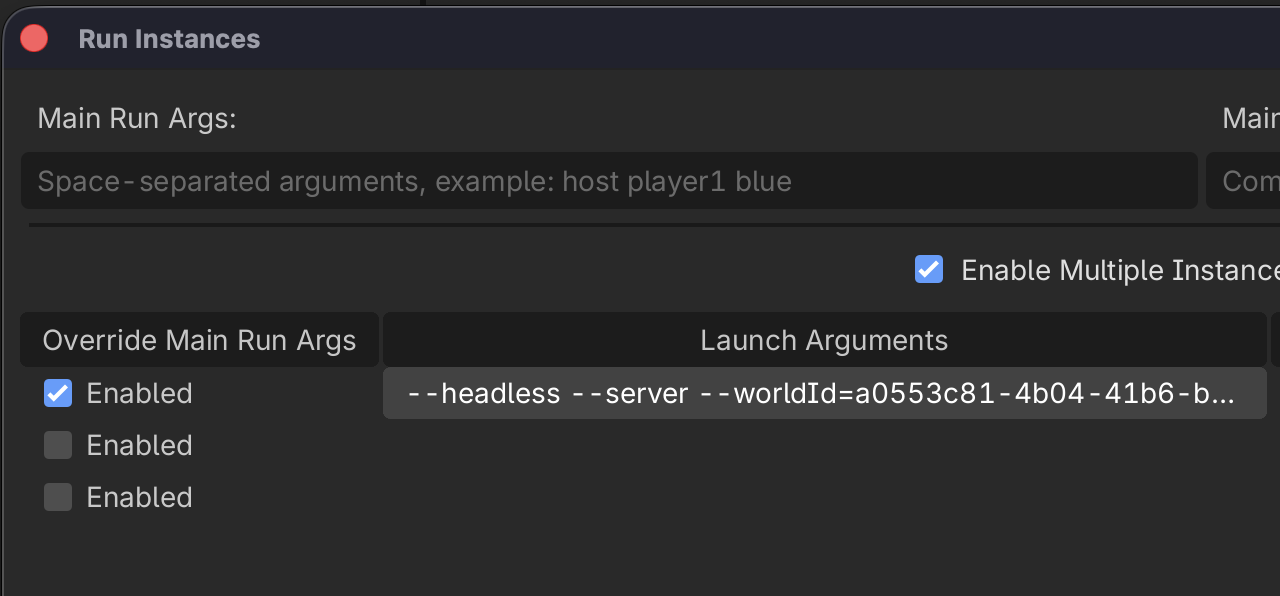
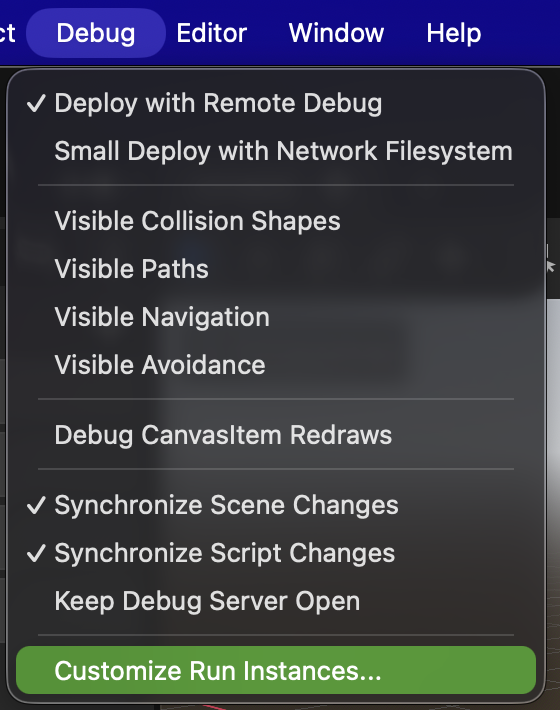
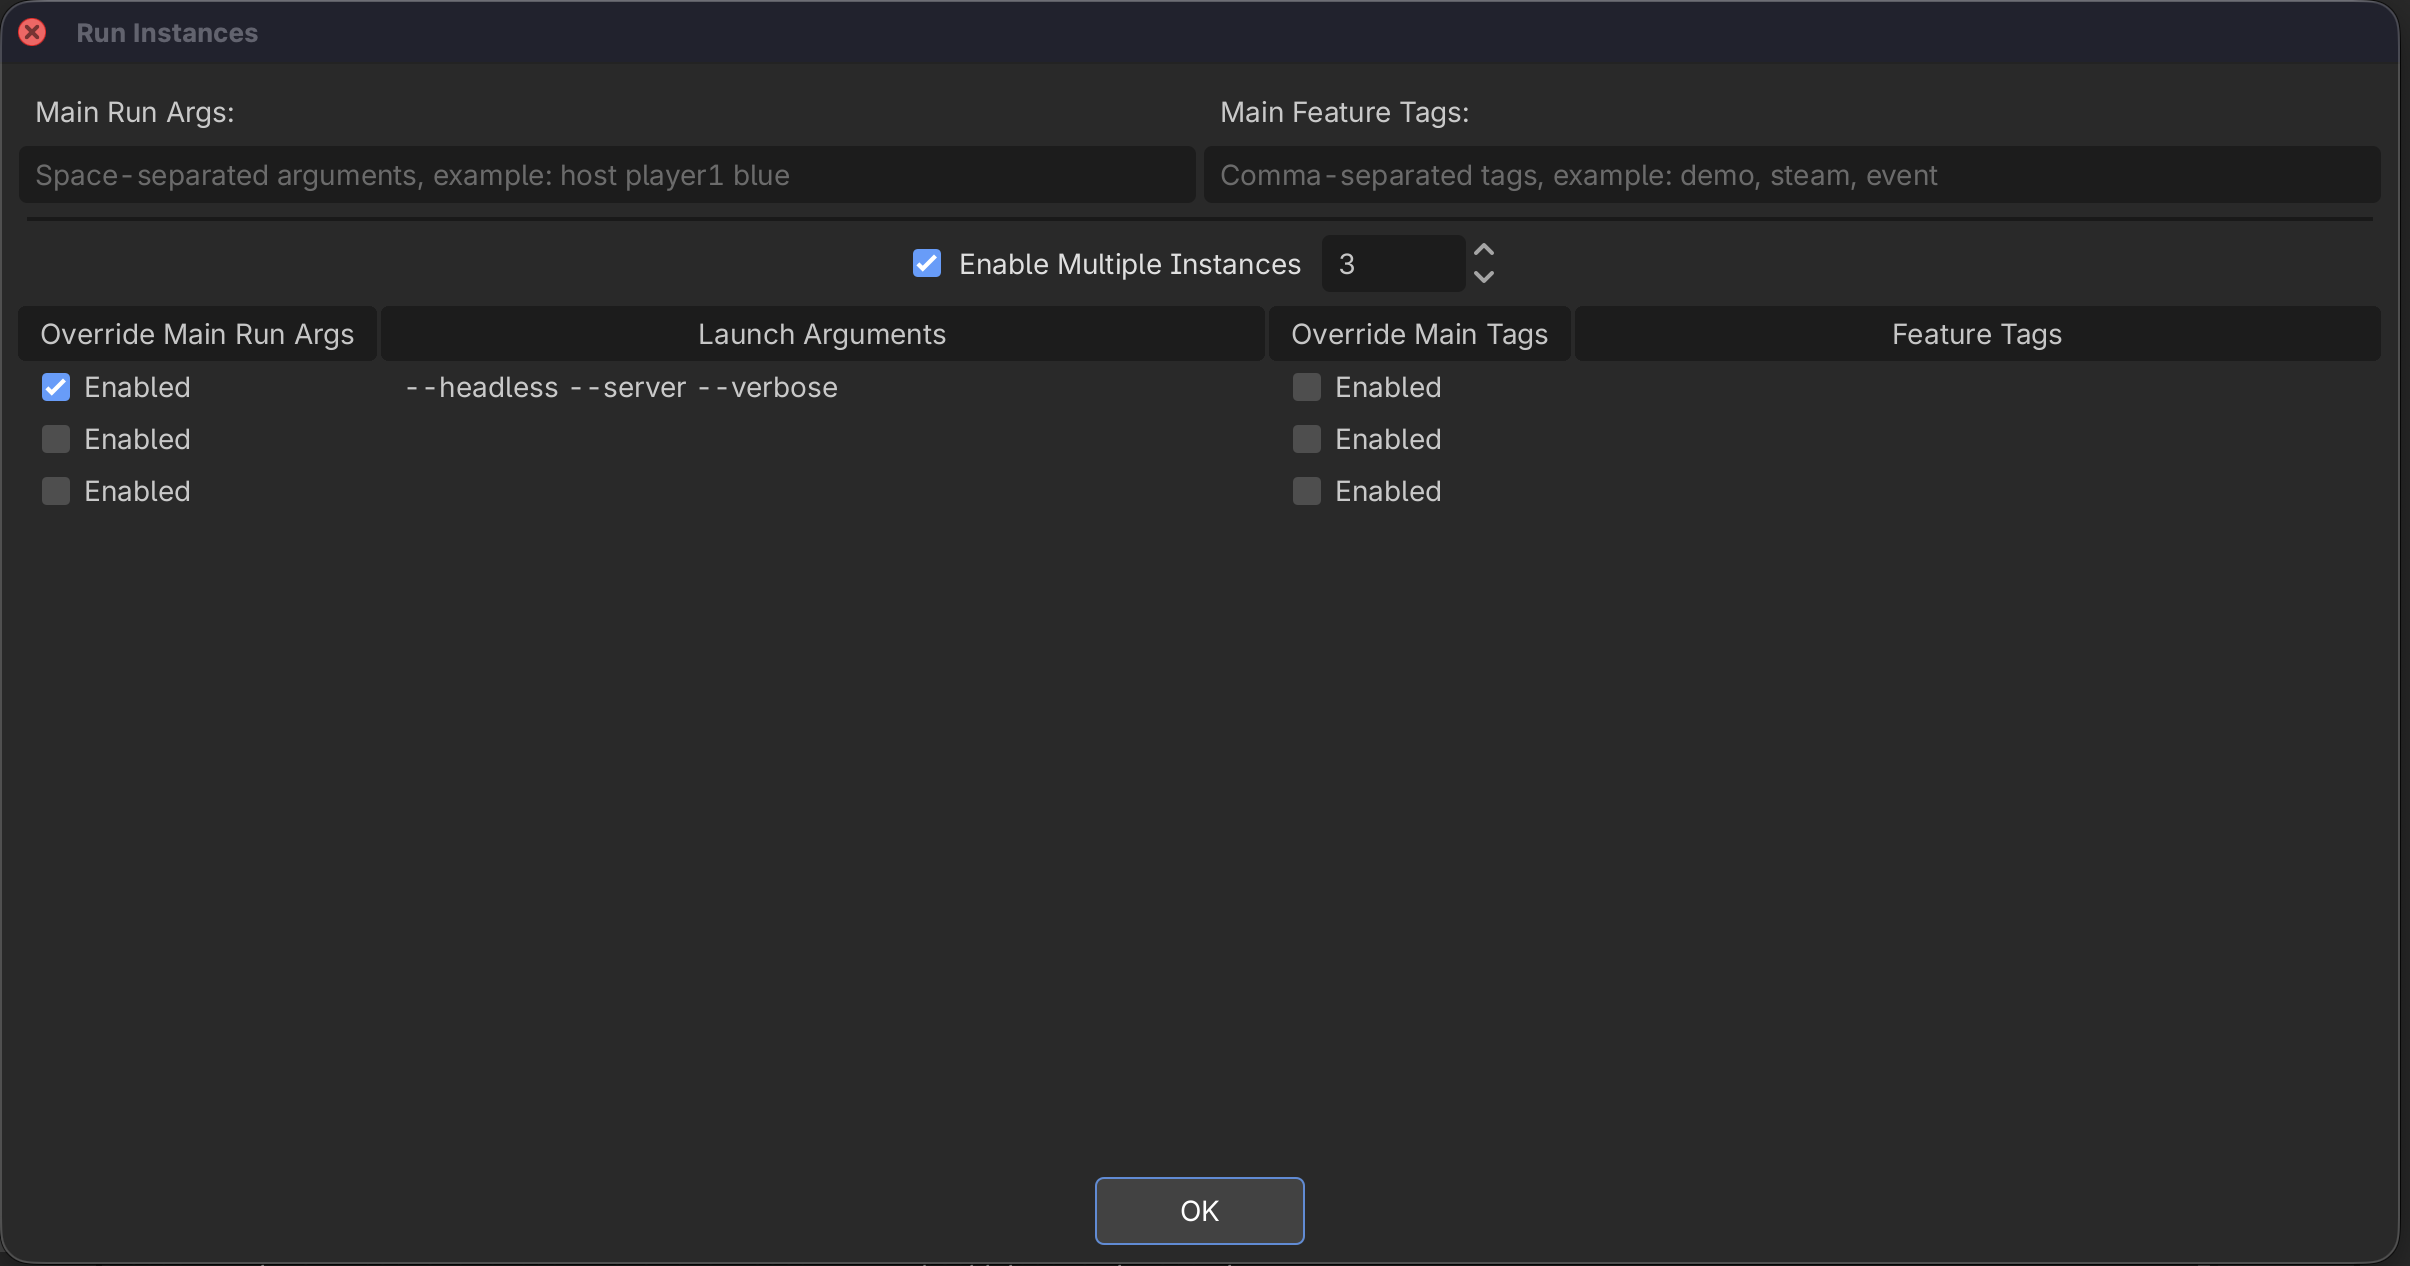
Now we'll configure Godot to run three instances: a server and two clients.
That's it. Now we can run the game. The output should show something similar to the following:
Godot Engine v4.6.rc1.mono.official.481f36ed2 - https://godotengine.org
(INFO) Nebula.Server: Starting Server
(INFO) Nebula.Server: Started on port 8888
(VERBOSE) Nebula.Server: Started debug server on 127.0.0.1:59910
(INFO) Nebula.Server: Loading initial world scene: uid://ck5p7purmvbqv
(INFO) Nebula.Server: No existing World data found. Create fresh World instance.
(INFO) Nebula.Server: GameArena _WorldReady!
(INFO) Nebula.Server: Server ready
(INFO) Nebula.Server: Peer connected

Godot Engine v4.6.rc1.mono.official.481f36ed2 - https://godotengine.org
Metal 4.0 - Forward Mobile - Using Device #0: Apple - Apple M3 Max (Apple9)
ServerClientConnector _Ready
(INFO) Nebula.Client: ServerClientConnector prepareClient
(INFO) Nebula.Client: Started
(INFO) Nebula.Client: Connected to server
(INFO) Nebula.Server: Peer connected
(INFO) Nebula.Client: Changing scene to Node3D
(INFO) Nebula.Client: GameArena _WorldReady!

Godot Engine v4.6.rc1.mono.official.481f36ed2 - https://godotengine.org
Metal 4.0 - Forward Mobile - Using Device #0: Apple - Apple M3 Max (Apple9)
ServerClientConnector _Ready
(INFO) Nebula.Client: ServerClientConnector prepareClient
(INFO) Nebula.Client: Started
(INFO) Nebula.Client: Connected to server
(INFO) Nebula.Client: Changing scene to Node3D
(INFO) Nebula.Client: GameArena _WorldReady!
Our clients have connected to our server, and everyone got the correct GameArena _WorldReady! output! That means the server told the clients what scene to use as their World.
Nebula is all setup. In the next chapter, we'll spawn our player characters and setup the game arena.
Bonus
This section is not important to completing the tutorial or making Big Chungus. Feel free to skip this part if it's confusing or boring. The following provides a little extra info on Worlds and gets more technical.
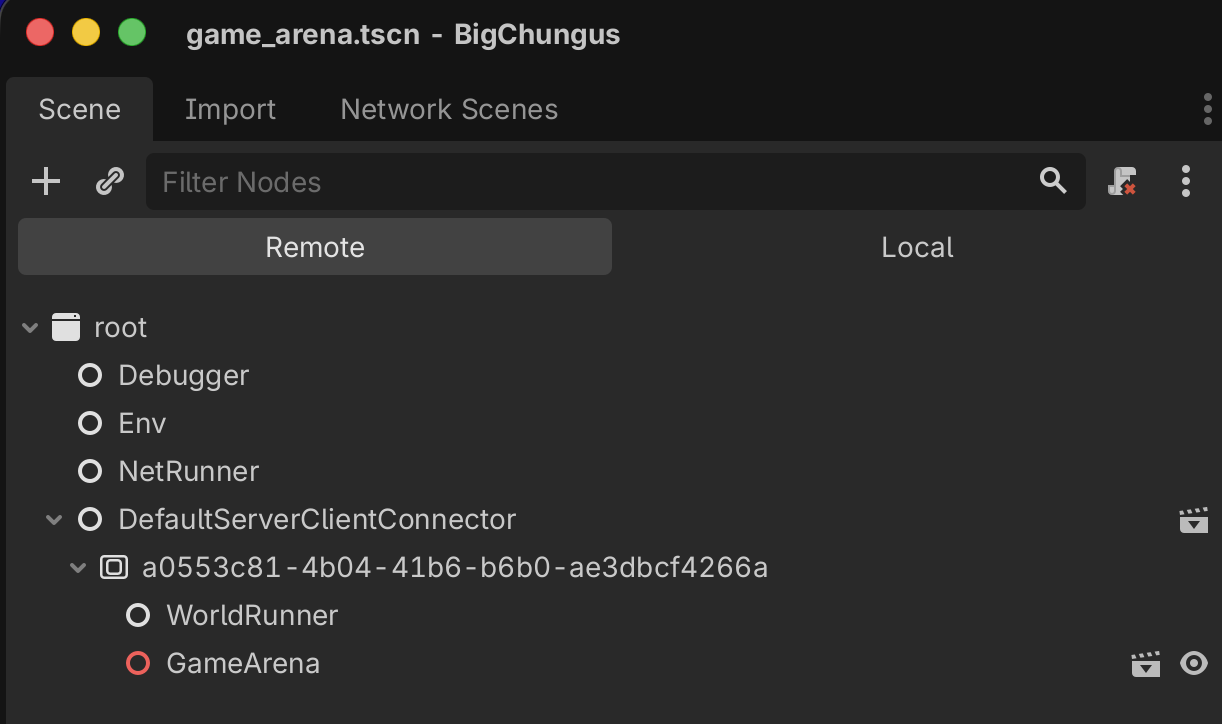
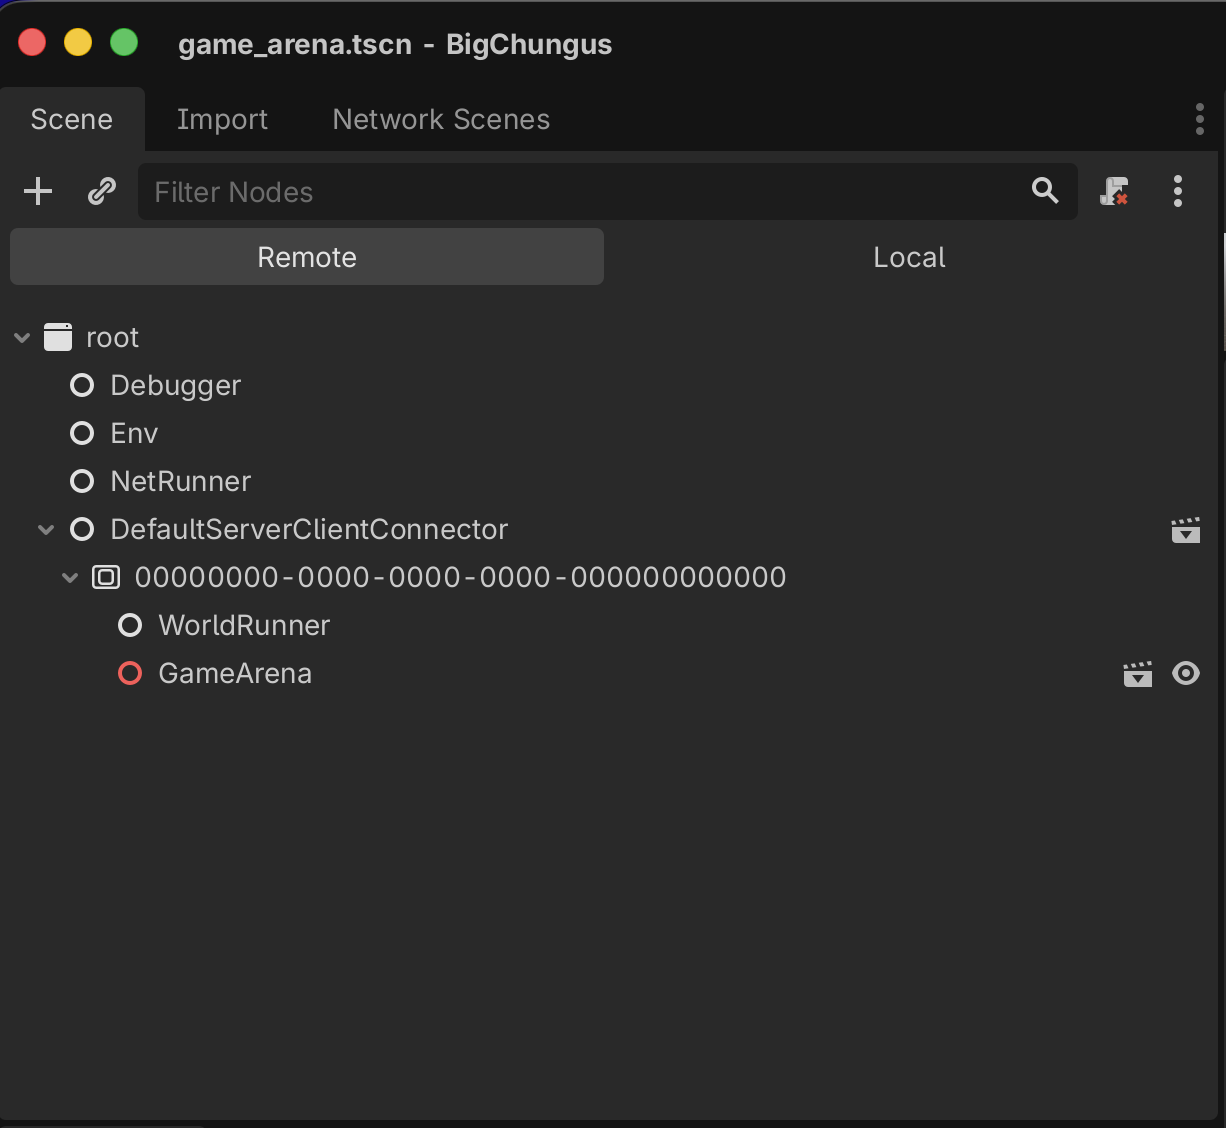
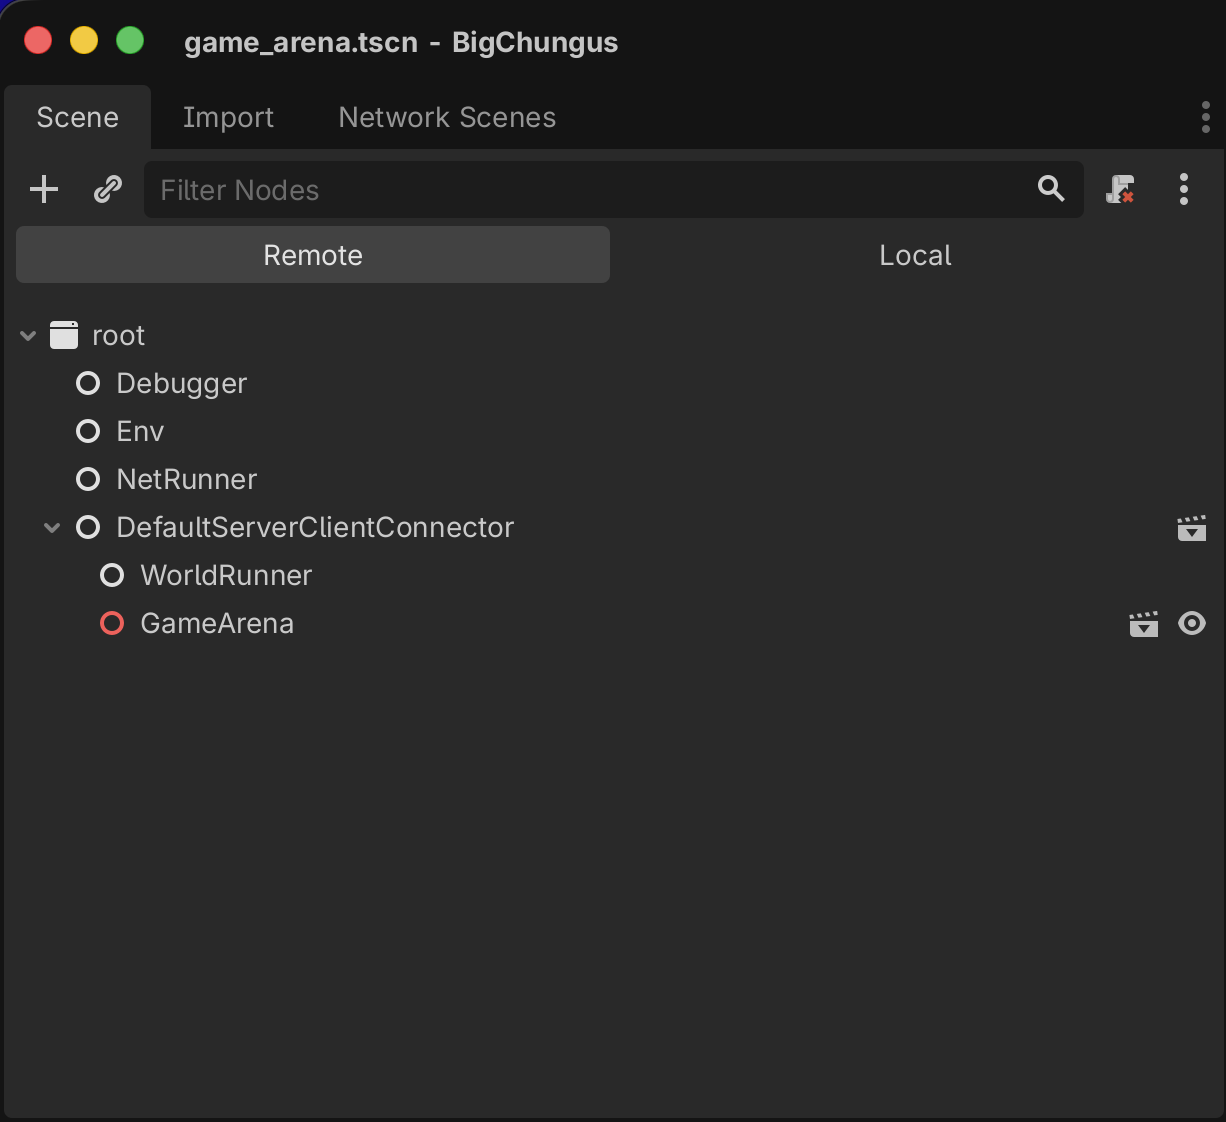
If you want, you can use Godot's debugger to look at the scene tree for the server instance, and compare it to the client instance. You'll see a difference:
Server instance:
Client instance:
Notice how the server has the extra 00000000-0000-0000-0000-000000000000 node? That's a World3D. Nebula uses those to spawn isolated instanced environments. You might recognize the crazy number as being a null uuidv4 / GUID. This is the World ID, which is null since we didn't specify one.
One of the ways we can specify a World ID is by using a command line argument. Then we'll see it reflect in the server's scene tree accordingly.